Accessing the AI Image Tab
The AI Image tab lives in the Media Library modal. You can open it from:
- Add Media when editing a post or page
- Site Editor or Block Editor when inserting an image block and choosing “Media Library”
- Media → Library in the admin menu, then “Add New” (or any flow that opens the media modal)
Finding the Tab
- Open the Media Library using one of the flows above.
- Check the top tabs – You’ll see “Media Library”, “Stock Images”, “AI Image Generation”, and “AI Video Generation”.
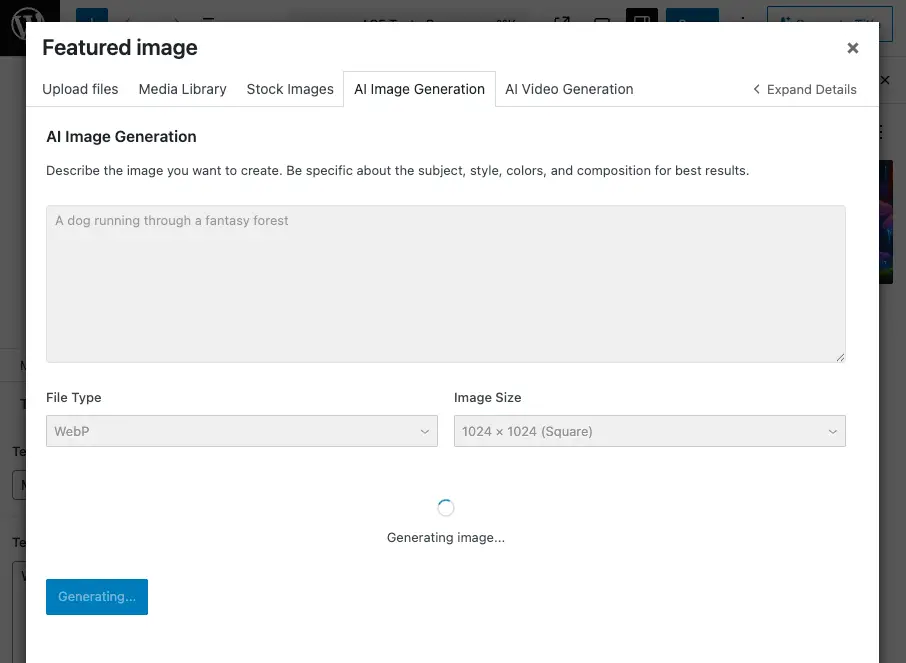
- Click “AI Image Generation” – The tab shows the prompt field, size/format options, and the Generate button.
If you don’t see the AI Image Generation tab:
- Ensure at least one image provider is set up: Cortex AI → Settings → Image, then choose a provider (OpenAI, Gemini, or Stability AI), add an API key, and save.
- Confirm you have Manage options (typically Administrator).
- Refresh the page after changing settings.
Writing Effective Image Prompts
The prompt is the main control over what the AI creates. Better prompts lead to more usable images.
What to Include
- Subject – What (or who) is in the image? Be clear and specific.
- Setting and context – Where is it? Indoor/outdoor, time of day, environment.
- Style and mood – Photorealistic, illustration, minimalist, etc. Mention lighting and tone if it matters.
- Composition – Framing, angle, or layout when relevant (e.g. “close-up”, “wide shot”, “centered”).
Example Prompts
Vague: “A nice landscape.”
Clear: “A serene mountain landscape at sunset with golden light reflecting on a calm lake, photorealistic, no people.”
Product-style: “Clean product photo of a white ceramic mug on a wooden table, soft natural light from the left, shallow depth of field, white background.”
Abstract: “Abstract gradient background, soft blues and purples, smooth transitions, no text, suitable for a website hero.”
Tips
- Add negative details sparingly – Some providers support “avoid X”; use when you need to exclude specific elements.
- Reference style – “In the style of…”, “similar to…”, or “looks like a… photograph” can help.
- Iterate – If the first result isn’t right, adjust the prompt (subject, style, or composition) and generate again.
Choosing Image Size, Dimensions, and Aspect Ratios
Options depend on your Image API provider in Cortex AI → Settings → Image. The AI Image tab shows the controls that match your selection.
OpenAI (DALL·E)
Uses fixed size presets:
- 1024 × 1024 – Square
- 1792 × 1024 – Landscape
- 1024 × 1792 – Portrait
Choose “Image Size” from the dropdown. You also select File type (WebP, JPG, or PNG).
Gemini
Uses aspect ratio only:
- 1:1 – Square
- 16:9 – Landscape
- 9:16 – Portrait
Select “Aspect Ratio” in the tab. The model generates an image matching that ratio. File type (WebP, JPG, PNG) is also available.
Stability AI
Uses custom width and height:
- Width and height between 128 and 2048 pixels, in steps of 64 (e.g. 512, 1024, 1536).
- You can choose File type as well.
Stability maps your dimensions to the closest supported aspect ratio: 1:1, 16:9, 9:16, 21:9, 9:21, 2:3, 3:2, 4:5, or 5:4. The final image may differ slightly from exact pixel dimensions but will match one of these ratios.
Choosing the Right Format
- Square (1:1) – Avatars, icons, social tiles, product thumbnails.
- Landscape (16:9 or similar) – Headers, banners, blog featured images, YouTube thumbnails.
- Portrait (9:16 or similar) – Stories, vertical social posts, mobile-first graphics.
Pick the option that matches where you’ll use the image.
Selecting File Types
You can choose WebP, JPG, or PNG (where supported for your provider).
- WebP – Good balance of quality and file size; well supported in modern browsers.
- JPG – Widely compatible; best for photos or gradients without transparency.
- PNG – Use when you need transparency or lossless quality.
Not all providers support every format the same way. If you notice limitations (e.g. no transparency for JPG), switch file type and generate again.
Previewing and Uploading Generated Images
1. Generate
- Enter your prompt and set size/aspect ratio and file type.
- Click Generate Image.
- A spinner and “Generating image…” message appear. Generation usually takes a few seconds to a minute depending on provider and load.
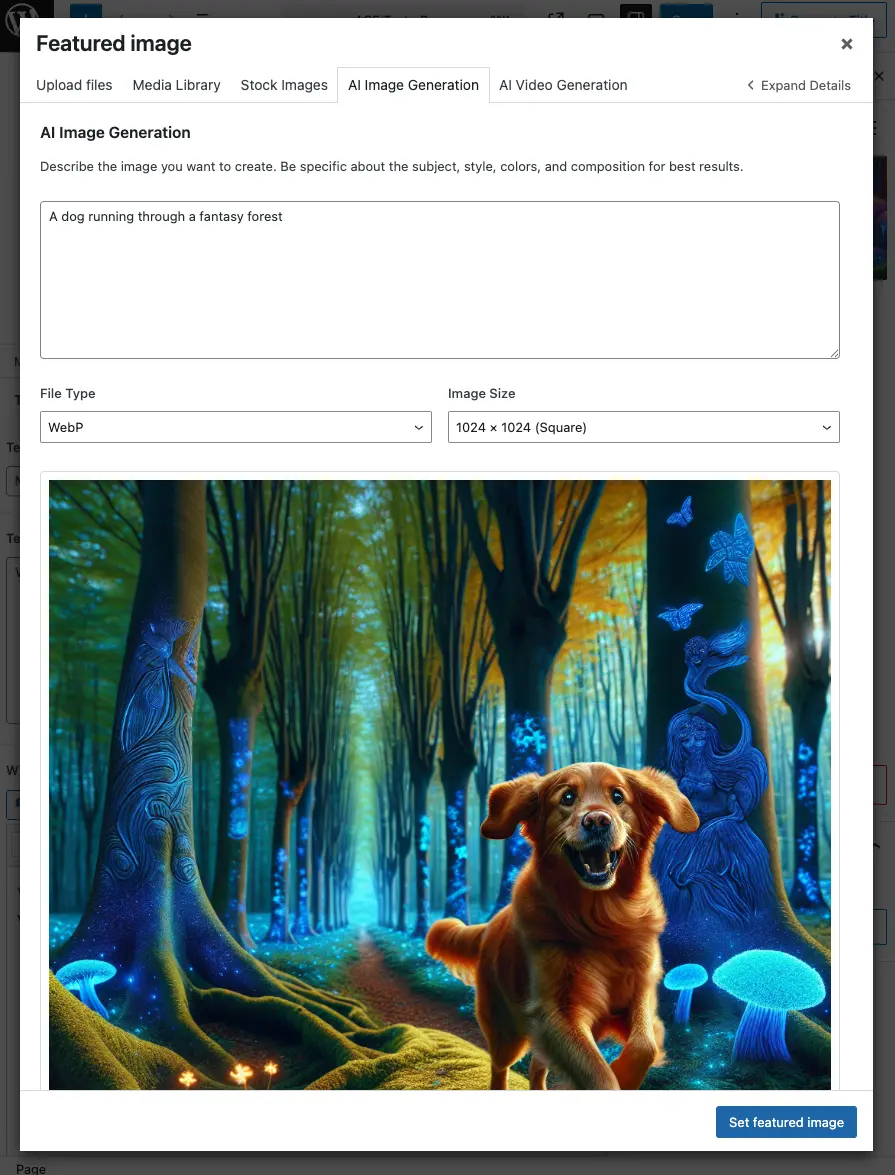
2. Preview
When generation finishes:
- The image appears in a preview area.
- You get two actions:
- Discard – Close the preview, clear the result, and keep your current prompt and options so you can edit and regenerate.
- Add to Media Library – Upload the previewed image into WordPress.
3. Upload
- Click Add to Media Library.
- “Uploading to Media Library…” is shown while the file is saved.
- When done, you’ll see a success message with:
- View in Media Library – Switches to the main Media Library tab and selects the new attachment so you can use it straight away.
- Generate Another Image – Clears the form and lets you create a new image.
4. Using the New Image
After View in Media Library, the new image is selected in the Media Library. You can:
- Insert into content – Use “Insert” (or equivalent) in the media modal.
- Edit attachment – Add alt text, caption, etc.
- Use in blocks – Insert it via image blocks, galleries, or other media-aware blocks as usual.
If you stay on the AI Image tab and generate again, you can Discard the current preview or Add to Media Library before generating another.
Best Practices
- Configure your provider first – Set Image provider, API key, and model under Cortex AI → Settings.
- Prompt clearly – Include subject, setting, style, and composition. Refine based on results.
- Match size to use – Use square for avatars/icons, landscape for headers/banners, portrait for stories.
- Pick the right file type – WebP for general use, JPG for photos, PNG when you need transparency.
- Preview before uploading – Always check the preview; discard and regenerate if it’s off.
- Add alt text – After upload, edit the attachment and add descriptive alt text for accessibility and SEO.
Troubleshooting
AI Image Generation Tab Missing
- Confirm Image provider and API key are set in Cortex Plugin → Settings → Image and save.
- Ensure you have Manage options (e.g. Administrator).
- Refresh the page after changing settings.
- Check that the Media Library modal is the standard WordPress one (plugin/theme can override it).
Plugin configuration is missing
- Refresh the page. The script may have loaded before the plugin passed its config.
- If it persists, check that the Cortex Plugin is active and no JavaScript errors appear in the browser console.
Generation Fails or Errors
- Verify API key – Correct key for the chosen provider, no extra spaces, and (if applicable) enough credits.
- Check prompt – Some providers restrict certain content; try a simpler, neutral prompt.
- Try another provider – If one fails repeatedly, switch provider in Settings and test again.
- Network – Ensure the site can reach the provider’s API (firewall, etc.).
Preview Looks Wrong
- Adjust the prompt – Add or change details (style, lighting, composition).
- Try a different size or aspect ratio – It can change composition and framing.
- Regenerate – Same prompt can produce different results; discard and generate again.
Upload Fails
- Check server limits – PHP
upload_max_filesizeandpost_max_sizemust allow the downloaded image. - Temporary storage – Ensure the server can write temp files (e.g.
/tmpor equivalent). - Retry – Transient network issues sometimes cause failures; try again.
Next Steps
- Generate videos – Use the AI Video Generation tab for AI-generated videos.
- Use stock photos – See Searching and Importing from Unsplash for stock imagery.
- Alt text – Enable Automatic Alt Text Generation for new uploads, or run Batch Alt Text Generation for existing images.
Once your image provider is configured, the AI Image tab is a fast way to create custom graphics, illustrations, and photos without leaving the Media Library.