Accessing the AI Video Tab
The AI Video tab lives in the Media Library modal. You can open it from:
- Add Media when editing a post or page
- Site Editor or Block Editor when inserting a video block and choosing “Media Library”
- Media → Library in the admin menu, then “Add New” (or any flow that opens the media modal)
Finding the Tab
- Open the Media Library using one of the flows above.
- Check the top tabs – You’ll see “Media Library”, “Stock Images”, “AI Image Generation”, and “AI Video Generation”.
- Click “AI Video Generation” – The tab shows the prompt field, resolution/duration options, and the Generate button.
If you don’t see the AI Video Generation tab:
- Ensure at least one video provider is set up: Cortex Plugin → Settings → Video, then choose a provider (OpenAI or Gemini), add an API key, and save.
- Confirm you have Manage options (typically Administrator).
- Refresh the page after changing settings.
Writing Effective Video Prompts
The prompt is the main control over what the AI creates. Better prompts lead to more usable videos.
What to Include
- Subject and action – What (or who) is in the video? What are they doing? Be clear and specific about movement and activity.
- Setting and context – Where is it? Indoor/outdoor, time of day, environment, weather.
- Camera work – Shot type (wide, close-up, medium), camera movement (pan, zoom, static, tracking), angle (low, high, eye-level).
- Style and mood – Photorealistic, cinematic, documentary, etc. Mention lighting, color tone, and atmosphere if it matters.
- Duration considerations – Since videos are short (4-12 seconds), focus on a single action or moment rather than complex sequences.
Example Prompts
Vague: “A nice sunset.”
Clear: “Wide shot of a child flying a red kite in a grassy park, golden hour sunlight, camera slowly pans upward as the kite rises, gentle breeze, photorealistic.”
Cinematic: “Close-up of raindrops hitting a window pane, soft focus, city lights blurred in the background, slow motion, moody blue lighting, cinematic quality.”
Action-focused: “Medium shot of a chef tossing vegetables in a wok, steam rising, vibrant colors, professional kitchen setting, camera static, natural lighting.”
Tips
- Focus on a single moment – Short videos work best with one clear action or scene rather than multiple events.
- Specify camera movement – Mention pans, zooms, tracking shots, or static camera to guide the composition.
- Describe motion – Be explicit about how things move (slowly, quickly, smoothly, erratically).
- Iterate – If the first result isn’t right, adjust the prompt (subject, camera work, or style) and generate again.
Video Generation Options
Options depend on your Video API provider in Cortex Plugin → Settings → Video. The AI Video tab shows the controls that match your selection.
Resolution
Both providers support two resolution options:
- 1280 × 720 (HD) – Standard HD resolution, suitable for most web use cases.
- 1920 × 1080 (Full HD) – Higher quality, better for larger displays or professional use.
Duration
Duration options vary by provider:
OpenAI (Sora)
- 4 seconds – Short clips, quick actions, or brief moments.
- 8 seconds – Standard length, good for most scenarios.
- 12 seconds – Longer clips, more complex scenes or extended actions.
Gemini (Veo)
- 4 seconds – Short clips (only available at 1280×720 resolution).
- 6 seconds – Medium length (only available at 1280×720 resolution).
- 8 seconds – Standard length, available at all resolutions.
Note: When using Gemini with 1920×1080 resolution, the duration is automatically set to 8 seconds (4 and 6 second options are disabled).
Choosing the Right Options
- Resolution – Use 1280×720 for web content, social media, or when file size is a concern. Use 1920×1080 for higher quality needs or larger displays.
- Duration – Match duration to your content: 4 seconds for quick actions, 8 seconds for standard scenes, 12 seconds (OpenAI only) for more complex sequences.
Understanding Video Generation Status
Video generation is an asynchronous process that takes time. The AI Video tab shows status updates throughout the process.
Generation States
- Starting – “Starting video generation…” appears when you click Generate. The request is sent to the provider.
- Queued – “Status: Queued – Waiting to start…” means the video is in the provider’s queue, waiting for processing to begin.
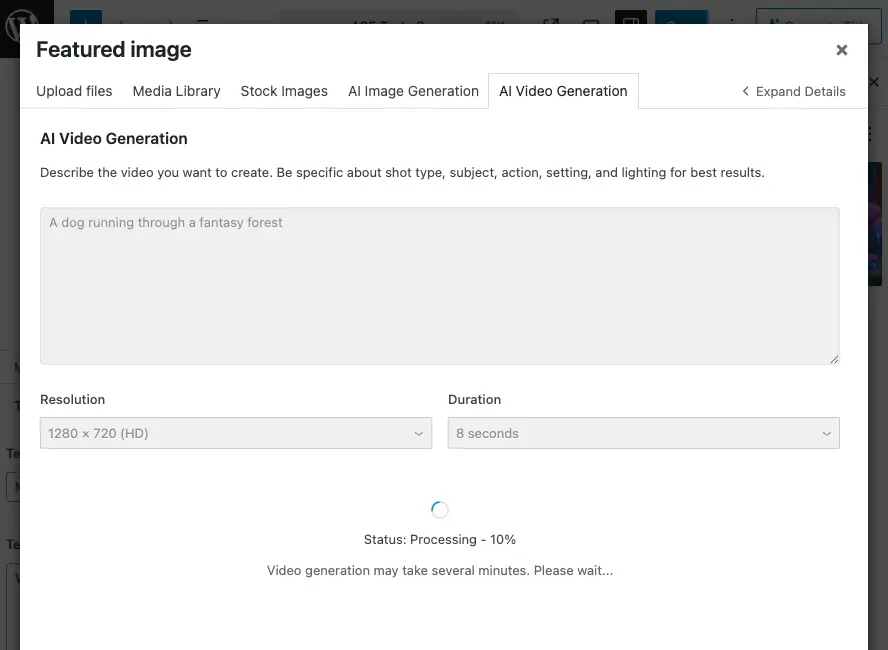
- Processing – “Status: Processing…” (Gemini) or “Status: Processing – X%” (OpenAI) shows the video is being generated. Progress percentage is only available for OpenAI.
- Downloading – After processing completes, the video is downloaded to your server. “Downloading video…” appears during this step.
- Preview – Once downloaded, you can preview the video before uploading to the Media Library.
- Uploading – “Uploading to Media Library…” appears when adding the video to WordPress.
- Success – A success message confirms the video was added to your Media Library.
Status Polling
The plugin automatically checks video status every 10 seconds while processing. This happens in the background—you don’t need to refresh the page.
- Maximum wait time – The plugin polls for up to 5 minutes (30 attempts). If generation takes longer, you’ll see a timeout message.
- You can leave the page – The status persists if you navigate away and return, so you can continue working while the video generates.
Error States
If generation fails, you’ll see an error message with options to:
- Retry – Resume polling for the same video ID (useful if the error was temporary).
- Start Over – Clear the current generation and begin a new one.
Previewing and Uploading Generated Videos
1. Generate
- Enter your prompt and set resolution and duration.
- Click Generate Video.
- A spinner and status message appear. Generation usually takes several minutes depending on provider, queue length, and video complexity.
2. Monitor Progress
While the video generates:
- Watch the status updates in the tab (Queued → Processing → Downloading).
- For OpenAI, you’ll see a progress percentage during processing.
- The message “Video generation may take several minutes. Please wait…” reminds you that this is normal.
You can continue working in other tabs or leave the page—the status persists when you return.
3. Preview
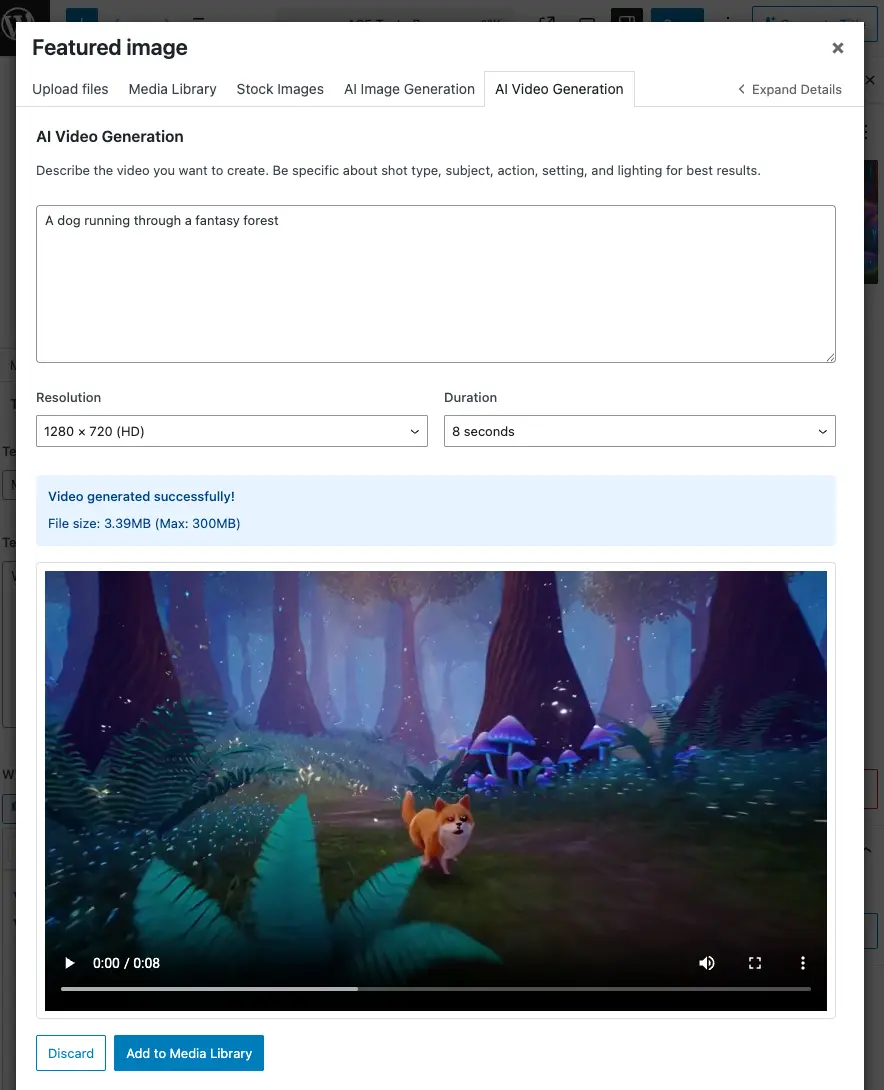
When generation finishes and the video downloads:
- The video player appears in a preview area with playback controls.
- File size information shows the video size and your server’s maximum upload limit.
- You get two actions:
- Discard – Close the preview, clear the result, and keep your current prompt and options so you can edit and regenerate.
- Add to Media Library – Upload the previewed video into WordPress.
File size warnings – If the video file is close to or exceeds your server’s upload limit, a warning appears. You may need to adjust server settings or choose a shorter duration/lower resolution.
4. Upload
- Click Add to Media Library.
- “Uploading to Media Library…” is shown while the file is saved.
- When done, you’ll see a success message with:
- View in Media Library – Switches to the main Media Library tab and selects the new attachment so you can use it straight away.
- Generate Another Video – Clears the form and lets you create a new video.
5. Using the New Video
After View in Media Library, the new video is selected in the Media Library. You can:
- Insert into content – Use “Insert” (or equivalent) in the media modal.
- Edit attachment – Add title, caption, description, etc.
- Use in blocks – Insert it via video blocks or other media-aware blocks as usual.
If you stay on the AI Video tab and generate again, you can Discard the current preview or Add to Media Library before generating another.
Video Generation Timeframes
Video generation is slower than image generation due to the complexity of creating moving content.
Typical Timeframes
- Queue time – Usually a few seconds to a minute, but can be longer during peak usage.
- Processing time – Typically 2-5 minutes for most videos, but can vary based on:
- Provider (OpenAI vs Gemini may have different processing speeds)
- Video complexity (more detailed prompts may take longer)
- Duration (longer videos generally take more time)
- Provider load (peak times may slow processing)
- Download time – Usually a few seconds, depends on file size and your server’s connection speed.
Total Time
Expect 3-6 minutes total from clicking Generate to having a previewable video, though it can be faster or slower depending on the factors above.
Patience is key – Unlike images that generate in seconds, videos require more processing time. The status messages keep you informed, and you can work on other tasks while waiting.
Best Practices
- Configure your provider first – Set Video provider, API key, and model under Cortex Plugin → Settings.
- Prompt clearly – Include subject, action, camera work, setting, and style. Focus on a single moment or action for best results.
- Match duration to content – Use 4 seconds for quick actions, 8 seconds for standard scenes, 12 seconds (OpenAI) for more complex sequences.
- Choose appropriate resolution – Use 1280×720 for web/social media, 1920×1080 for higher quality needs.
- Be patient – Video generation takes several minutes. Monitor status but don’t refresh unnecessarily.
- Preview before uploading – Always check the preview; discard and regenerate if it’s not what you need.
- Check file sizes – Be aware of server upload limits, especially for longer or higher resolution videos.
- Add metadata – After upload, edit the attachment and add title, description, and other metadata for better organization.
Troubleshooting
AI Video Generation Tab Missing
- Confirm Video provider and API key are set in Cortex Plugin → Settings → Video and save.
- Ensure you have Manage options (e.g. Administrator).
- Refresh the page after changing settings.
- Check that the Media Library modal is the standard WordPress one (plugin/theme can override it).
Plugin configuration is missing
- Refresh the page. The script may have loaded before the plugin passed its config.
- If it persists, check that the Cortex Plugin is active and no JavaScript errors appear in the browser console.
Generation Fails or Errors
- Verify API key – Correct key for the chosen provider, no extra spaces, and (if applicable) enough credits or access to video generation features.
- Check prompt – Some providers restrict certain content; try a simpler, neutral prompt.
- Try another provider – If one fails repeatedly, switch provider in Settings and test again.
- Network – Ensure the site can reach the provider’s API (firewall, etc.).
- Provider availability – Video generation features may have limited availability or require special access (e.g., OpenAI Sora and Gemini Veo may be in beta or require approval).
Video Generation Times Out
- Wait longer – Some videos take more than 5 minutes. You can retry with the same video ID if the generation is still in progress on the provider’s side.
- Check provider status – The provider’s service may be experiencing delays or outages.
- Try a simpler prompt – Complex prompts may take longer to process.
Preview Fails to Load
- Wait a moment – The video file may still be processing on the server.
- Refresh the video URL – The plugin attempts this automatically, but you can try again.
- Check file integrity – The downloaded file may be corrupted; try generating again with the same or a modified prompt.
Status Stuck on “Queued” or “Processing”
- Wait – This is normal, especially during peak usage. Processing can take several minutes.
- Check provider status – The provider’s service may be experiencing high load.
- Don’t refresh unnecessarily – The status updates automatically; refreshing won’t speed things up.
Next Steps
- Generate images – Use the AI Image Generation tab for AI-generated images.
- Use stock photos – See Searching and Importing from Unsplash for stock imagery.
Once your video provider is configured, the AI Video tab is a powerful way to create custom video content, animations, and motion graphics without leaving the Media Library. Remember that video generation takes time, but the results can be worth the wait.